2.Getting Started
After importing the package from the Asset Store you are ready to start creating wires. If this is your first time using the package, it is recommended to import the “_Demo” folder as well.
Setting up a connector
Wires are connected to objects via connector components. A connector represents a position to which a wire can be connected from and to.
To set up a connector, select the GameObject you want to add it to. Then, in the inspector, go to Add Component -> Wire Network -> Connector. You’ll be prompted to assign a Wire Type to this connector. In the _Demo folder, several Wire Types are included which you can use, or modify.
You can either add a connector to an empty GameObject, and position it freely. Or add it directly to a Mesh and it will be placed at the pivot point.
Setting up connector groups
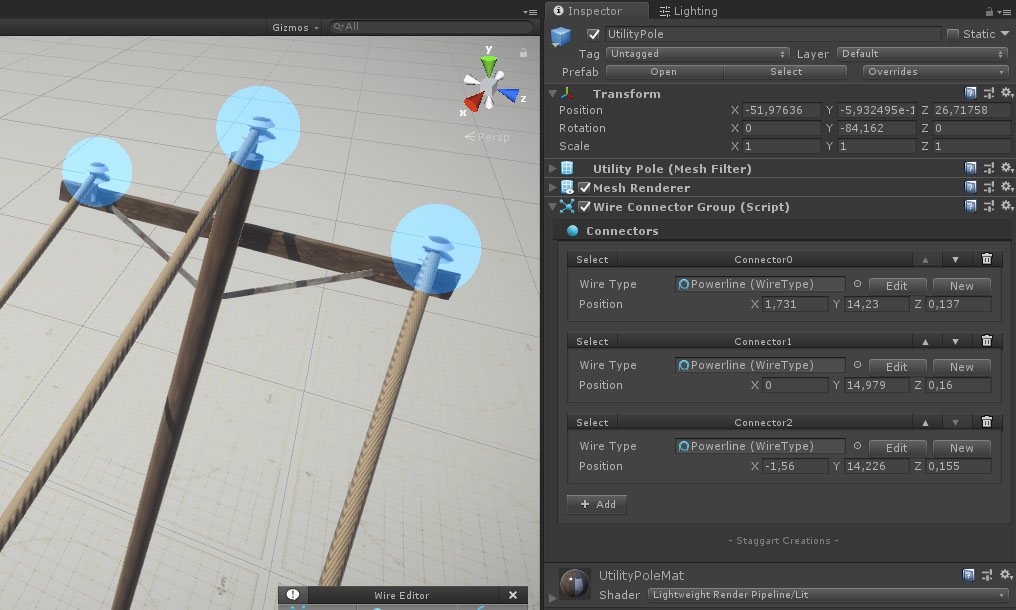
Groups are a collection of connectors, which should be used when an object has multiple connection points. The most obvious example is a utility pole used for power lines. Groups can also be duplicated through the editor, where wires will automatically be created between the selected and new group.

Included example Utility pole model with 3 power line connectors configured
To set up a group, place the model you want to use in the scene. Then. in the inspector, go to Add Component -> Wire Network -> Connector Group.
Next, click the “Add” button and position the newly created connector, be sure to assign a wire type to this connector. Repeat this for the number of wires that should be connected to this group. When you’re finished, create a prefab of the object by dragging it into your project window.
See also: Using the editor

