
Stylized Water 3 - Underwater Rendering (Extension)
3.Getting Started
Base asset
At this point you should already have the Stylized Water 3 asset installed. The Underwater extension will import directly into its folder. If not, see to this first!
You may get script/shader console errors when using an older version, not all of which can be gracefully handled on my end.

Initial set up
To make underwater rendering possible go to Window→Stylized Water 3→Set up render feature (grayed out if already set up).
The rendering relies on URP’s “Opaque texture”. By default it’s resolution is set to half. In order to achieve full clarity, set the downsampling mode to “None” on your pipeline asset
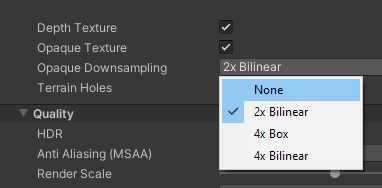
You may otherwise choose to keep it downsampled, as a performance saving measure!
Creating an underwater area
Rendering takes effect whenever a camera enters an Underwater Area object. It’s bounds are defined by an attached Box Collider (trigger) component.
See the Usage Instructions page on how to set one up.