
Stylized Water 3 - Underwater Rendering (Extension)

4.Usage instructions
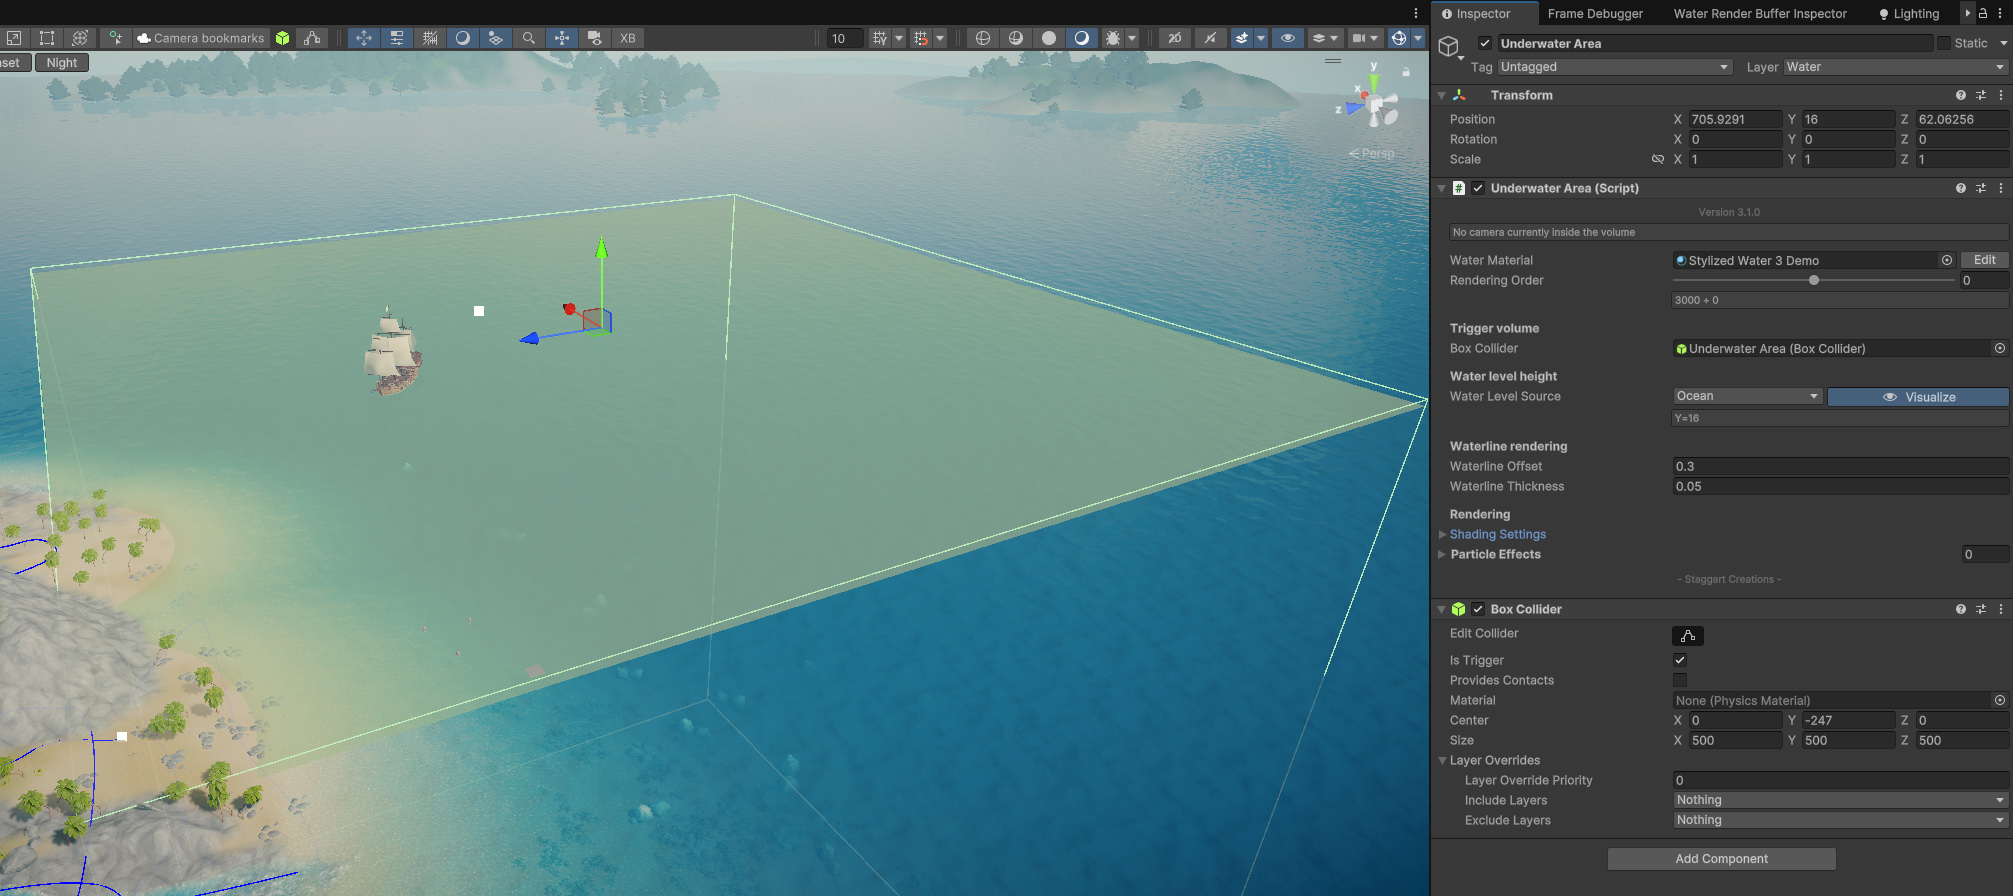
Underwater Area Component
To create one, go to GameObject→3D Object→Water→Underwater Area (with or without VFX pre-configured)
Next:
- Assign the water material that is used in the scene, and set the water level to match the Y-position (in world-space) of the water plane. If there is only 1 water object in the scene, or an ocean, the water material and level will be automatically configured for you.
- Adjust the Box Collider to your liking.
- Make sure the top sits a bit above the actual water!
- Navigate the scene-view camera into the Box Collider
- Adjust the “Shading Settings” to your liking
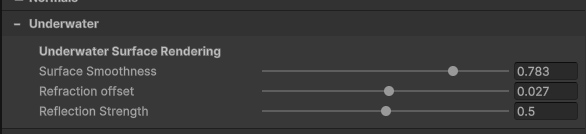
On the water material you’ll now find some paramaters, specific to the shading of the underwater surface.
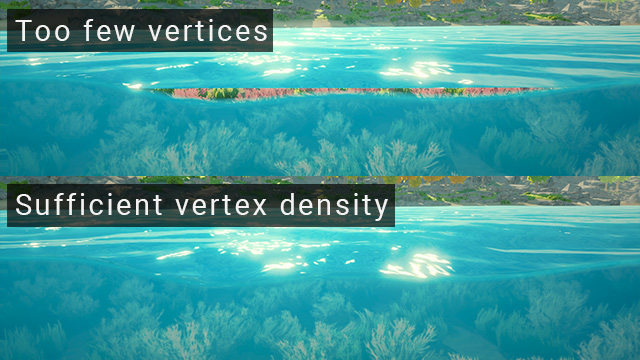
Water vertex density
In order to prevent cracks between the waterline and the water surface. The water mesh requires a decent vertex count (eg. 4 vertices per unit) near the camera.
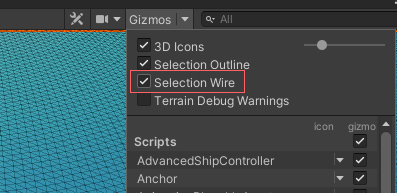
To inspect a mesh’s wireframe, you have to enable this in the Gizmo menu
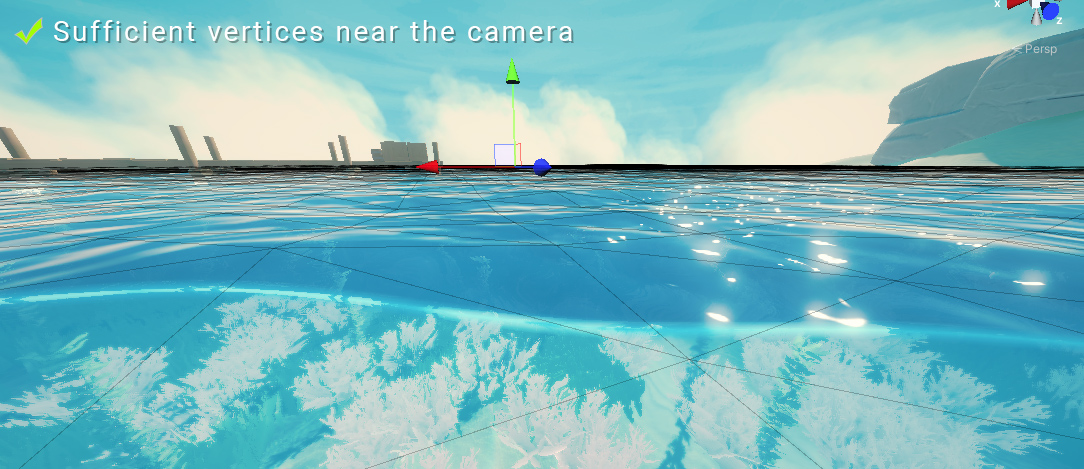
If you are using a mesh for the water surface, with vertices spaced out too far apart, you’ll start seeing cracks between the water line and water surface.
Fog and large worlds
It’s important to understand that the underwater fog is based on scene depth. If the terrain abruptly ends, showing a void/skybox, the fog will appear as 100% dense there (since its infinitely far away). This also happens when there is simply nothing under water.
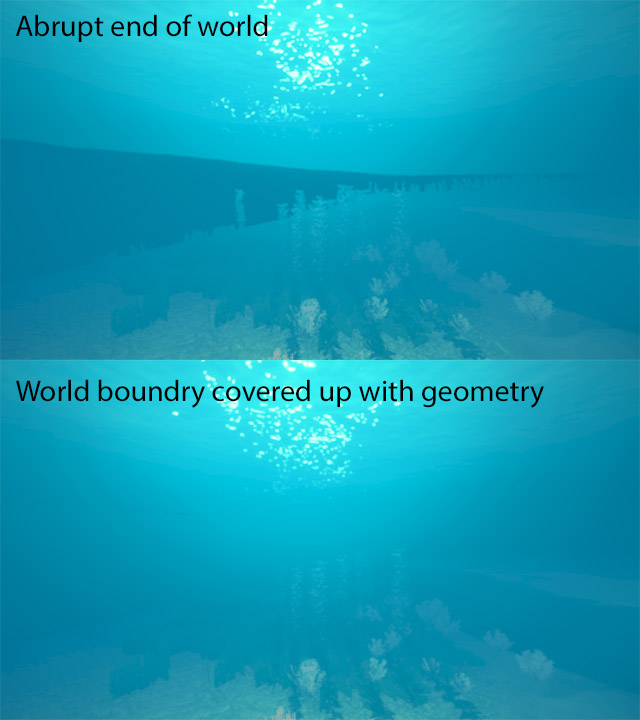
Consider taking this into account and ensure the boundaries of your world does not have any holes. Most open world games have a stretch of land that goes beyond the playable area for such reasons.