
Stylized Water 3 - Underwater Rendering (Extension)
7.Transparent Materials
Fog rendering
The effect relies on the depth texture Unity renders, which provides a means for shaders to measure the distance from the camera to an object’s pixel on screen. Based on this distance, a certain amount of fog is applied.
As such, shaders that don’t support depth writing will not be affected by fog. This usually means:
- Transparent materials (water/particles/etc).
- Sprites.
- UI elements
- Details/grass rendered through the terrain system.
- Custom shaders without a DepthOnly pass.
These materials will either turn invisible under water, or completely unfogged!
The only way around this is to incorporate the fog shading into custom a shader for the above purposes, and using that instead. This is how Unity’s standard fog works, which applies fog directly to an object, rather than as a post-processing effect.
Use the Stylized Water 3/Underwater Transparent shader on particle materials that are used underwater
Incorporating underwater rendering into another shader
You may have a custom transparent shader, for example a fake volumetric light beam or weapon VFX. These will need to incorperate underwater rendering.
Hand-written
Hiding a transparent material under water: https://pastebin.com/vEVN2EZu
Blending a transparent material into the underwater fog: https://pastebin.com/gk66GhUG
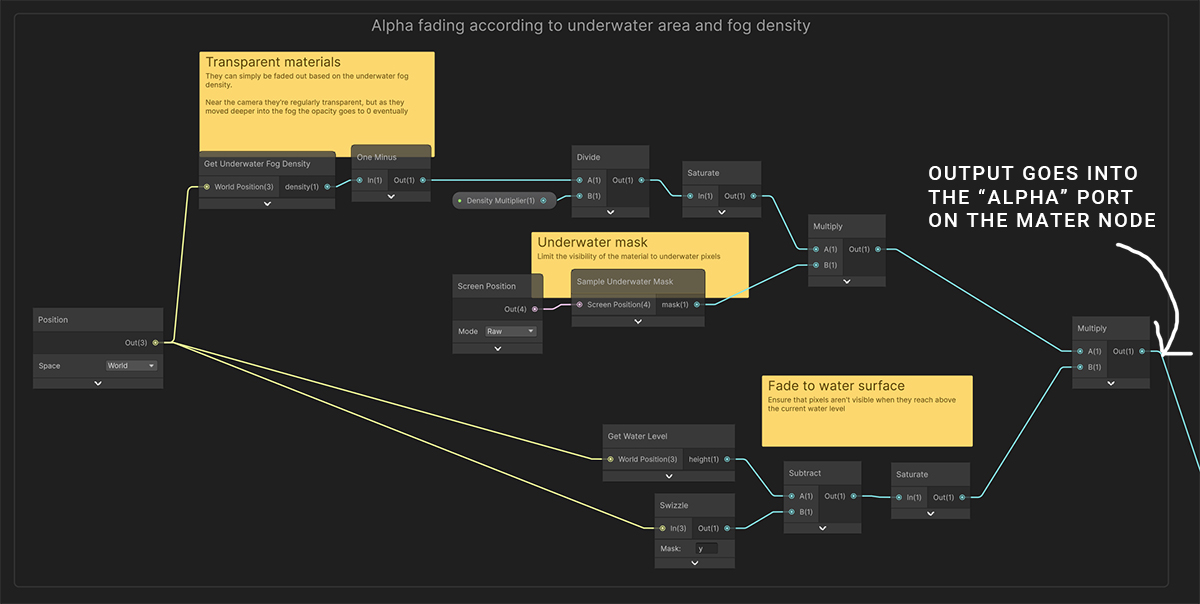
Shader Graph
You can implement correct underwater shading by following this example structure:
In the StylizedWater2/Shaders/Underwater/Shader Graph folder you’ll find all the functionality needed to add support to a transparent shader.
As an alternative, use the Stylized Water 3/Underwater Transparent shader on particle materials that are used underwater (such as the light rays in the demo scene)
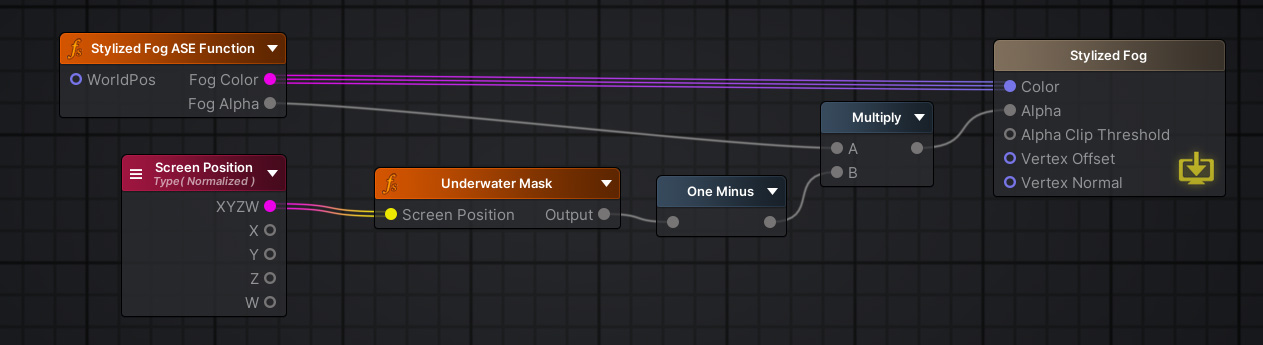
Amplify Shader Editor
Use the included Underwater Mask node.
For example, it can be integrated into AHF’s fog shader, limiting its visibility to pixels above the water.
Sorting
The underwater fog renders as a transparent material in front of the camera. Both it and the water shader work with a stencil to ensure they create a cohesive effect together.
This means that any other transparent material will:
- Appear to render completely unfogged.
- Appear (partially) invisible under water
By adjusting the Render Queue you can control which of two occurs. Transparent materials have a render queue of 3000 by default.
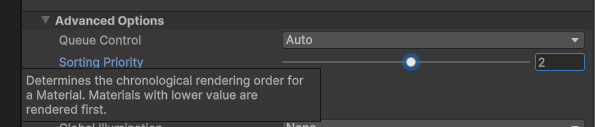
On any material you can offset the render queue through the “Sorting Priority” parameter. For example, the particle effects (bubbles, sunshafts, etc). Have a Sorting Priority of +2

On the Underwater Area component you can control the render queue of the underwater effect.

3000 is the render queue value of the assigned material
For correct shading of underwater rendering and transparent materials together, see the sections below.