
Stylized Water 3

3.Getting Started
Initial project set up
As of Unity 6, new projects are set up using the Universal Render Pipeline by default. So no set up is needed in that regard.
However, you must ensure that Compatibility Mode is disabled to use all features.
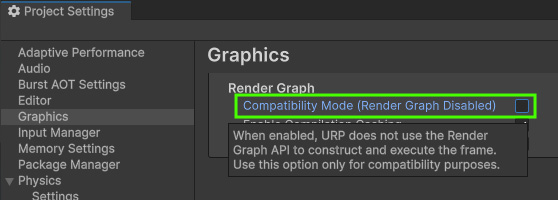
Universal Render Pipeline setup
TLDR:
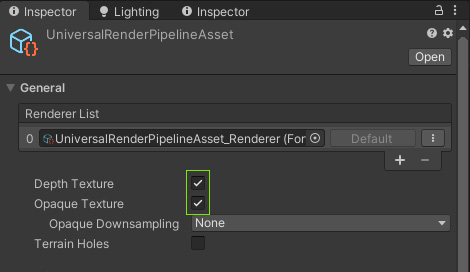
- Enable the Depth- and Opaque texture in your render pipeline settings
- Go to Window→Stylized Water 3→Set up render feature
Renderer
Double-click the pipeline asset and verify these options are enabled
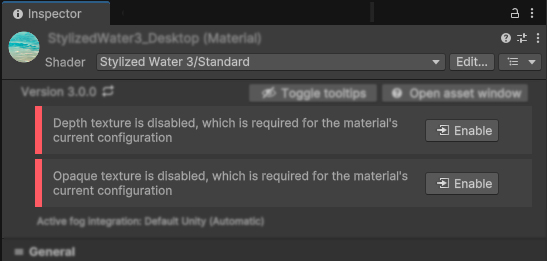
Should these options not be enabled, yet the shader is using features that require either one of them, a warning and quick-fix button will be displayed in the material UI:
Note that each individual camera can override these settings. If the effects aren’t visible in a specific scene, or for a specific camera. Verify that the options aren’t set to “Off”
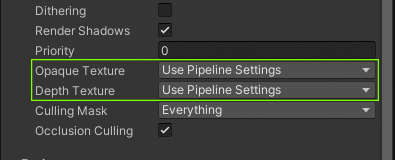
If you’re using different pipeline settings, per quality level. Ensure these options are also enabled on them. Otherwise you may notice some water effects not working when building the project, and running the game on a lower quality scale.
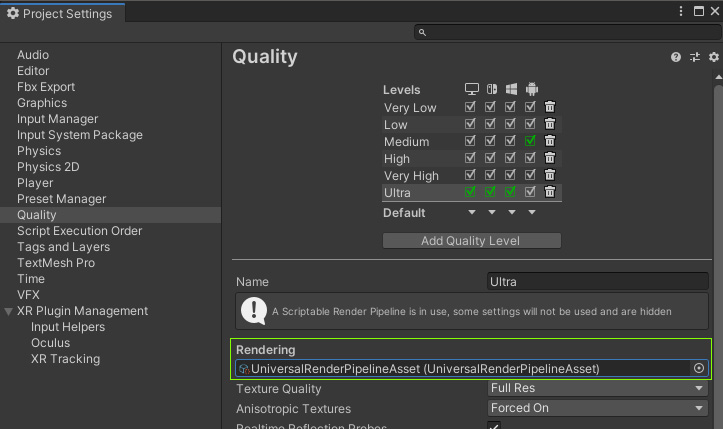
Tip: you can double-click the assigned asset to open it in the inspector
Render feature
Several aspects require the Stylized Water 3 render feature to be present. More often than not an error will be displayed in the inspector UI to inform you about it.
Go to Window→Stylized Water 3→Set up render feature
(It is recommended to do this manually so you only add this to renderers that need it)
Adding water to your scene
It’s best to consider the included materials examples and starting points.
Option 1
- Drag one of the prefabs found under Assets/StylizedWater3/Prefabs into your scene.
- Adjust the material properties to your liking, or swap it out with one in the StylizedWater3/Materials folder.
Option 2
- Go to the GameObject→3D Object→Water→Single Object menu option. A new Mesh Renderer will be created in view.
Option 3:
- Create a plane mesh in the scene
- Create and assign a new material to your water mesh and assign the shader found under Stylized Water 3/Default.
- Add a Water Object component to your mesh through Add Component→Stylized Water 3→Water Object.