Stylized Water 2 - Underwater Rendering (Extension)
4.Transparent Materials
The underwater fog will always render before transparent materials do. This is because the water surface is transparent, and needs to render on top of the underwater fog. Since the water shader uses the same shading function, both the fog and water appear to blend in seamlessly.
This means that any other transparent shader will appear to render completely unfogged. This is in part because it renders on top of the fog, but also because transparent material simply do not write to the depth texture.
Fog rendering
The effect relies on the depth texture Unity renders, which provides a means for shaders to measure the distance from the camera to an object’s pixel on screen. Based on this distance, a certain amount of fog is applied.
As such, shaders that don’t support depth writing will not be affected by fog. This usually means:
- Transparent materials (water/particles/etc).
- Sprites.
- UI elements
- Details/grass rendered through the terrain system.
- Custom shaders without a DepthOnly pass.
On these materials, no fog gets applied, because they’re virtually invisible to the effect. The only way around this is to incorporate the fog shading into custom a shader for the above purposes, and using that instead. This is how Unity’s standard fog works, which applies fog directly to an object, rather than as a post-processing effect.
Incorporating underwater rendering into another shader
Hand-written
Shader Graph
The underwater fog is based on the scene depth, to determine how far away a pixel is away from the camera.
As an alternative, use the Universal Render Pipeline/FX/Underwater Particle shader on particle materials that are used underwater (such as the light rays in the demo scene)
In the StylizedWater2/Shaders/Underwater/Shader Graph folder you’ll find all the functionality needed to add support to a transparent shader.
You’ll find a sub-graph in this folder:
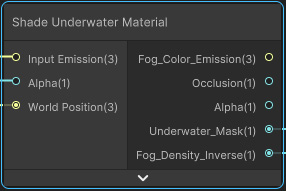
This applies the underwater fog in the same way as it’s done in the post processing effect.
- The input (emission) color will be blended with the fog color based on the fog density.
- The Fog Density output (value gets lower/darker further away from the camera) can also be used to multiply the graph alpha value.
The result will be that the material fades out into the fog.
- The fog color already has lighting applied to it, hence it adds onto the graph’s Emission value, not the albedo. This applies to both Lit and Unlit graphs.
- For Lit graphs, pipe in the Occlusion output into the Occlusion port on the Master Node. This avoids environment reflections being visible through the fog.
Graph example
Example for both Lit and Unlit graphs, where the fog color is applied.
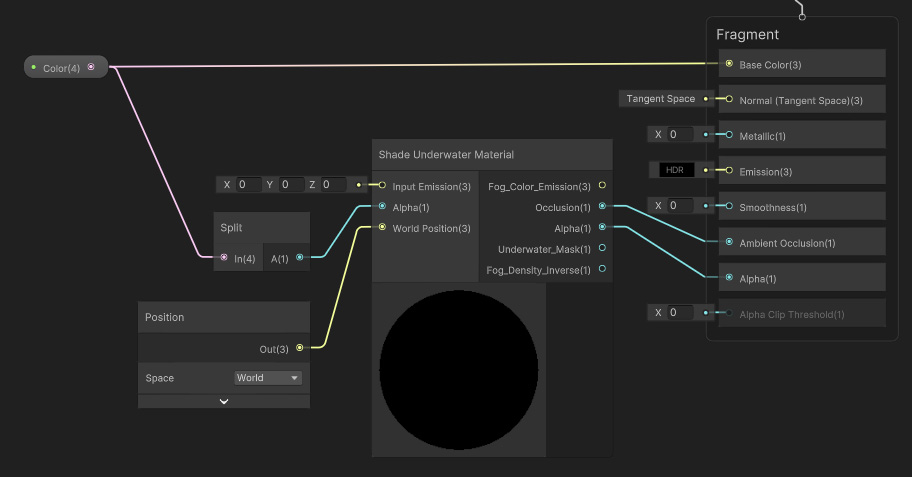
The Emission input/output isn’t used here. Instead, the material fades out as the underwater fog gets denser. Naturally, this makes it appear as if the material gets consumed by the fog, which is the end goal.
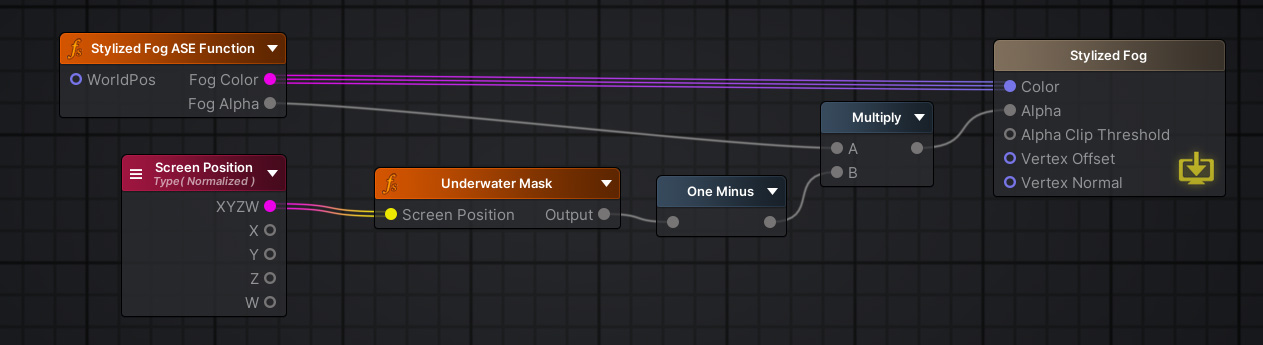
Amplify Shader Editor
Use the included Underwater Mask node.
For example, it can be integrated into COZY’s fog shader, limiting its visibility to pixels above the water: