Stylized Water 2 – Underwater Rendering docs

Stylized Water 2 - Underwater Rendering (Extension)

Stylized Water 2 - Underwater Rendering (Extension)
Version: 1.2.6
Review

2.Getting Started #

Base asset

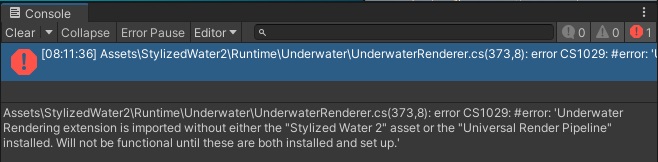
At this point you should already have the Stylized Water 2 asset installed. The Underwater extension will import directly into its folder. Without this installed first, you’ll be posed with at least one unsolvable console error.

Refunds can not be issued failing to acknowledge that this is an extension asset (mentioned on the store page 4 times). An alarming amount of users buy only the extension, without owning the water shader. This is not covered by the Asset Store refund policy (EULA).

The minimum version requirement of the Stylized Water 2 base asset is v1.5.0. You may get script/shader console errors when using an older version. Always try to update to the minimum required version

Initial set up

To enable underwater rendering in a scene, go to Window → Stylized Water 2 → Set up underwater renderer.

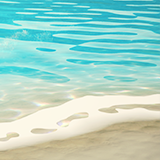
If there is only 1 water object in the scene, the water material and level will be automatically configured for you. Assign the water material that is used in the scene, and set the water level to match the Y-position (in world-space) of the water mesh.

Notifications with quick-fix buttons will be displayed if any other set up is required.

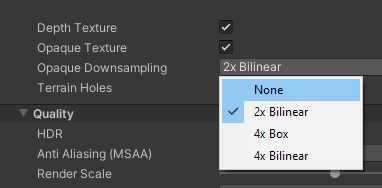
The effect relies on URP’s “Opaque texture”. By default it’s resolution is set to half. In order to achieve full clarity, set the downsampling mode to “None” on your pipeline asset

You’re now set! The waterline and underwater fog will automatically render once the bottom of the screen touches the water.

On the water material you’ll now find two paramaters, specific to the shading of the underwater surface

Yes No Suggest edit
Last updated on June 11, 2025
10 of 11 users found this section helpful
If you're familiar with this asset, please consider leaving a review!
Your support is what makes complementary updates possible!
Suggest Edit