4.3.Setup using URP Volume system
Enabling post processing
For post processing to take effect, this checkbox must be ticked on your default camera.

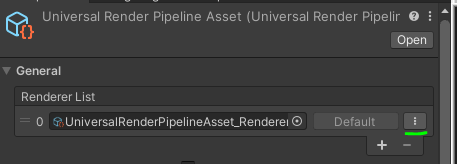
Starting from Unity 2021.2, you must also ensure post-processing is enabled on the renderer in use

Open up the renderer by clicking the context menu

Check that post processing is in fact enabled
Configuring an effect
Effects use the SRP Volume system to configure their settings, much like the Post Processing Stack works in the built-in render pipeline, as well as Unity’s built-in effects.
- Create a new volume through Create->Volume->Global Volume
- Assign a profile to the volume, or use the “New” button to create one
- To add an effect, click “Add override” and go to SC Post Effects/<Category>/<Effect name>
- Note that effects initialized with settings that render them invisible (to maintain blending functionality). An intensity/opacity/amount value will be set to 0, increase the value to start seeing an effect.
Note that effects are automatically added to the default renderer as configured in the URP settings asset. If you’re using multiple renderers, for different cameras, add it manually.
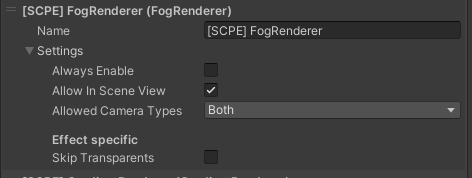
An effect’s render feature has several configurable options as well. A few effects, have settings specific to them. Mouse over the label to view a description.
6 of 6 users found this section helpful
If you're familiar with this asset, please consider leaving a review!
Your support is what makes complementary updates possible!


