
Building the world of Lake: Shading
The shading in Lake could simply be described as Non-Photorealistic Rendering (NPR), as opposed to PBR. Giving way for artistic freedom, yet not so far that it shies away completely from the rules of nature. Simplified rendering was also a practical choice, putting less strain on the production workload.
The game uses Deferred rendering, to avoid rendering depth and motion vector pre-passes for all objects and opening the door for easy decals integration.
Environment
PBR vs Legacy
Effectively this boils down to the difference between Unity’s Standard shader and their Legacy shaders (pre Unity 5.0). The latter uses the Lambertian and Blinn-Phong shading models, which are now pretty old-school. Combined, they basically lack the metallic and smoothness shading commonly seen today in Physically Based Shading (PBS).
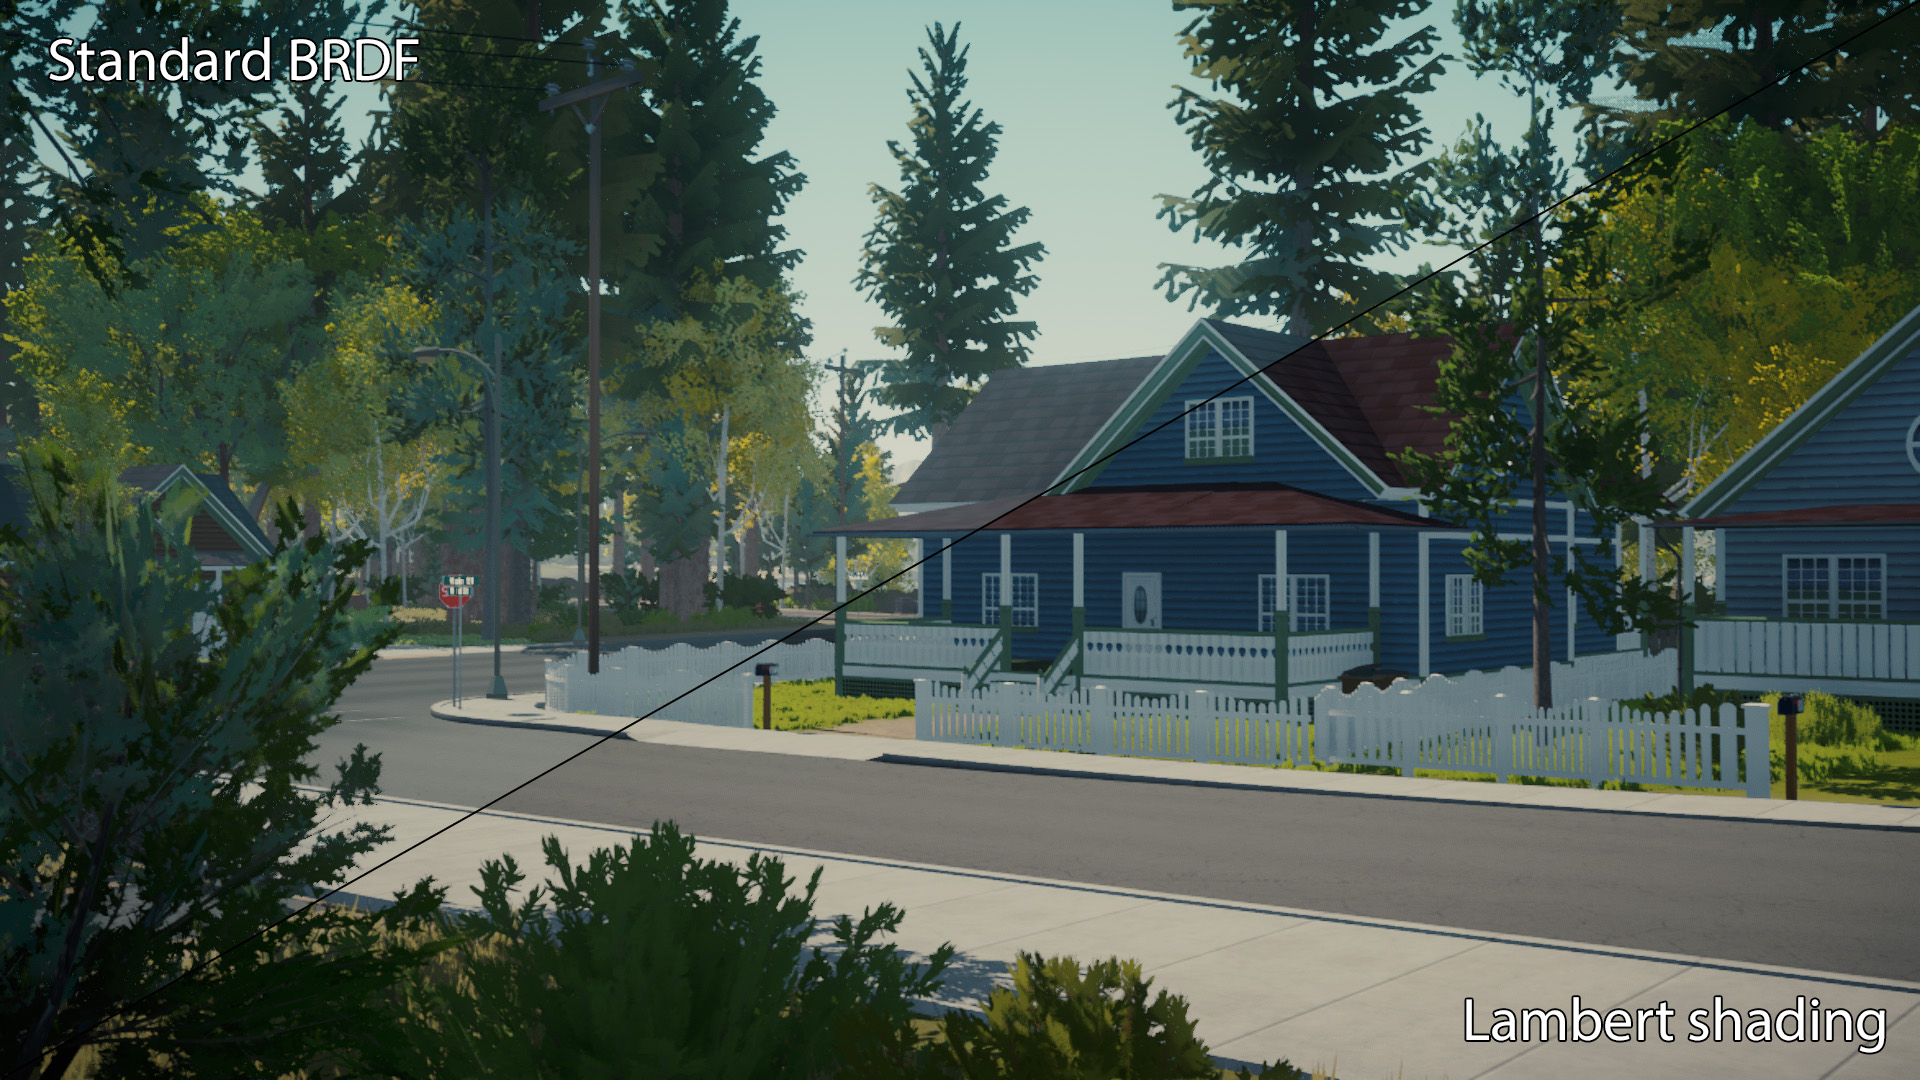
Unity’s standard BRDF (a combination of lighting functions that make up a whole) tends to add a sheen to all objects, which comes from reflection probes (or in absence of, just the skybox). It makes it easy to spot something isn’t quite right when not making use of Unity’s full lighting feature set. This effect is known as Fresnel shading, which describes how reflective a surface looks based on the viewing angle, relative to the surface.
Given the scope of the world, authoring metallicness and smoothness maps for all assets didn’t seem viable. Arguably, they aren’t all too important, expect for reflections. Which in turn puts an emphasis of having correct reflections set up throughout the world. Baked or real-time GI quickly becomes a nightmare when working with large (and multiple) scenes. Next to real-time reflection probes being woefully expensive.
Additionally, when using PBR, consistency is key, which would require strict coordination between artists and validation of materials. With all these possible complications, going for a simplified aesthetics seemed both technically and aesthetically more enticing.
With Lambert shading, surfaces get exactly the intended color, with only direct- and indirect light being mixed in. From the get-go, I adopted this shading model to avoid the many pitfalls.
Reflections
Generally, reflections were a bit of an exception to the “non-realistic” rule. The water surface for one did not translate as “water” without it, veering on the edge of cartoony. And the (non-transparent) windows on buildings looked barren and hardly convincing.
To achieve a reflective water surface the technique of a reflection camera was initially used (commonly referred to as a planar reflection). Where a secondary camera renders the scene from a reflected perspective underneath the water surface. This is a surefire way to achieve a mirror-like image, which can be distorted by the wave normal map, before being blended with the water color.
Though, it was certainly not without its disadvantages:
- Terrain and vegetation in view had to be rendered again, but from a reflected perspective. Doubling their rendering and shading cost.
- Planar reflections, as the name implies, is entirely flat. It could not be used on curved surfaces.
- The flat/planar nature of the reflection did not look very convincing on water. Which, out in the open, is never truly flat like a mirror.
- Fog and color grading weren’t applied to the reflected image, creating a very noticeable difference in color. Rendering these effects twice wasn’t acceptable.


Reflection probes on the other hand offer a spherical reflection, baked from a single point into a panoramic cubemap. Ideal for surfaces featuring curvature. Yet, the effect visually falls apart when the camera moves away from the probe’s center. Plastering the world full of reflections probes wasn’t going to work. Since the time of day can change, the reflections would quickly be outdated. Periodically re-baking them proved to be too expensive, turning the CPU timing graph into a spikey mess.
Instead, for every time of day point, a cubemap was pre-rendered in the editor and saved to a file. The tool built for this uses a regular Camera object, meaning post-processing effect such as fog are also captured (though sunshafts had to be ommited).
The lighting system then blends between two cubemaps at a time, and outputs the result to a “global” reflection probe, which is also exposed for shaders to incorporate however they need to.
This provided the accuracy of a spherical reflection combined with what seems to be real-time lighting, at practically no cost. A caveat is that the sun disk in the reflection is static, but this was never really noticeable. Next to only a single reflection capture at the center of the lake being used throughout the entire world.
Translucency
This simulates the behaviour of light passing through a medium, effectively losing some of its strength, but still making its way through it. It may sound woefully complex and expensive to render, but a simple approximation is in fact dirt cheap!
A similar and more accurate technique is Subsurface Scattering (SSS), but given that it aims for photorealism and requires more resources to render (raymarching + temporal reprojection), it was quickly dismissed. I prefer the term “translucency shading”, since it effectively doesn’t involve volumetrics or true scattering.
It was a personal ambition to add this effect to the vegetation. During moments with low sun angles, it truly makes a striking visual difference.
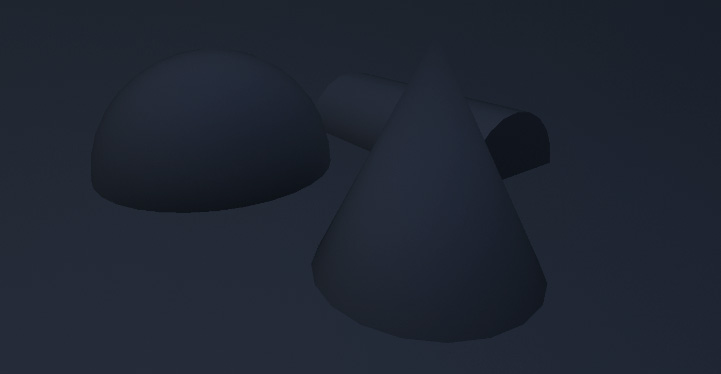
Having access to the sun’s shadow map is vital, since translucency must be hidden in shadowed pixels, and only be visible in direct light. Yet since the game was using Deferred rendering, it wouldn’t be possible to incorporate shadows into every shader. This has everything to do with the fact that shadows aren’t yet rendered by the time vegetation is, they’re “deferred” towards the end of a frame.
You can see here how the shadow map used for the effect lags behind one frame, causing visible ghosting…
Not long before the game released, the thought occurred to me to incorporate the effect directly into Unity’s deferred lighting shader. It’s very straightforward to make a copy of the Internal-DeferredShading.shader and assign it in Unity’s Graphics settings. Effectively overriding the shader the render pipeline will call on. I never had a reason to do so before, but after checking it out I realized a lot of interesting effects can be applied here directly (eg. cloud shadows, fog, color grading, etc).
In this shader, which has access to the scene geometry normals (surface orientation), light- and camera view direction. Adding the effect was a few lines of code away! Being deferred rendering, point and spot lights also added translucency shading out of the box.
But in order to filter out which objects the effect should apply to, every material had output a “thickness” value. Something like a brick wall, described as being absolutely dense, but a blade of grass being very thin. In turn, this controls the strength of the effect.
Given that smoothness shading wasn’t used, materials could output their thickness value to what’s normally used for Glossiness, so that this information could be accessed in the deferred lighting shader. The Alpha channel of GBuffer1 was repurposed for this.
All the vegetation meshes had Ambient Occlusion baked into their vertex colors, this could simply be used to represent thickness as well. Using a texture mask seemed overkill, seeing as both AO and shadows already masked the effect quite a bit.
For characters, the effect is implemented directly into the character shader. Since it renders using Forward shading, light and shadow information is already being worked with for shading, so adding something to it works in the same way.